Get Started with Git
Version control. A somewhat foreign phrase for most casual programmers. Unless you are invested in making long, elaborate software, you wouldn’t need to use it. However, it wouldn’t hurt to utilize one of the most popular version control systems out there: Git. Not only is it widely adopted in the open source community (with online hosting services such as GitHub, GitLab and Bitbucket using the tool to help developers host their code remotely), but it is also used in enterprise as well, most notably by Microsoft! Using Git at first can be somewhat of a hassle, but once you get into the rhythm of using it, you will start to wonder why you didn’t use it in the first place.
Why use Git?
![]()
We all have experimented with our code, one way or another. Oftentimes, we find ourselves making new copies of existing files so that we don’t mess up our original code, but new files take up unnecessary space, and cleaning up after our little experimentation session can be troublesome. On the other hand, when we work on our main code, we unintentionally delete code that we need, forcing us to rewrite it. Using version control solves most of these problems by giving you the option to save and view your code’s history, check out previous revisions of files and make multiple branches so that features can be worked on separately and merged into the main code later.
Git was initially written by Linus Torvalds to help him apply submitted patches to the Linux kernel. Considering the size of the Linux kernel codebase, instead of manually going through hundreds of lines of code to paste a few new lines, Git is designed to track any changes that were made and apply them accordingly. It takes into account any conflicting code, tracked and untracked files and which branch is being worked on (be it the main master branch or some branch named awesome-new-feature), among others.
Setting up a local repository
Let’s start with installing Git on your computer. Alternatively, you could install a portable version of Git on a pendrive. Once that is done, we will need to do some initial setup. First, we’ll need to set some global variables. Set your username and your e-mail address using these commands on the command line:
git config --global user.name "your-username"

git config --global user.email "you@domain.com"
These will only apply to the system you are working on, so you may need to reapply them if you are working on another computer. If you have a GitHub account, it is best to use your GitHub details for both username and e-mail, so that GitHub recognizes your commits when you push (i.e. upload) them to your online repositories.
Once that is done, you will need to apply Git to a folder so that it can track the files you place in it. This folder will become a local repository that records changes to your files over time. One way to do it is to initialize a new folder:
git init new-folder-name
Another way to do it is to initialize an existing folder as a repository by going into that folder first and running the command without the folder’s name:
git init
Git supports both text and binary files. One common text file to include is README.md, which is displayed below the list of files and folders when you view the repository on GitHub. This file also serves as general documentation of your repository. Create the file and save it to your local repository. Here’s an example of a README.md file:
# My First Repository

A repo where I store my experimental code.
Now that we have created our first file for the repository, we need to add it as a tracked file and commit (ie, save) the change:
git add -A

git commit -m "First commit"
Some tutorials will suggest using git add ., but that will only add files from the current working directory down. The -A flag ensures that it will add all of the untracked files (excluding the ignored files) regardless of which working directory you are on. You can, of course, add individual files. The commit command is where you document the changes you made since the last commit. Since this is the first commit, the message “First commit” will do. Alternatively, you may add an additional message by adding another -m flag:
git commit -m "First commit" -m "Added README.md"
Every time you make a commit, you are essentially saving a “snapshot” of the repository at that point in time. You may go back to any point in your code history if you wish, but that won’t be covered in this article.
Let’s say we wanted to save an online copy of our code or maybe even collaborate with other programmers on it remotely. We would need to create a remote repository (“remote” meaning hosted online on a server) that acts as the main codebase. Log on to GitHub and create a new repository. Make sure the remote repository’s name is the same as the repository on your computer.
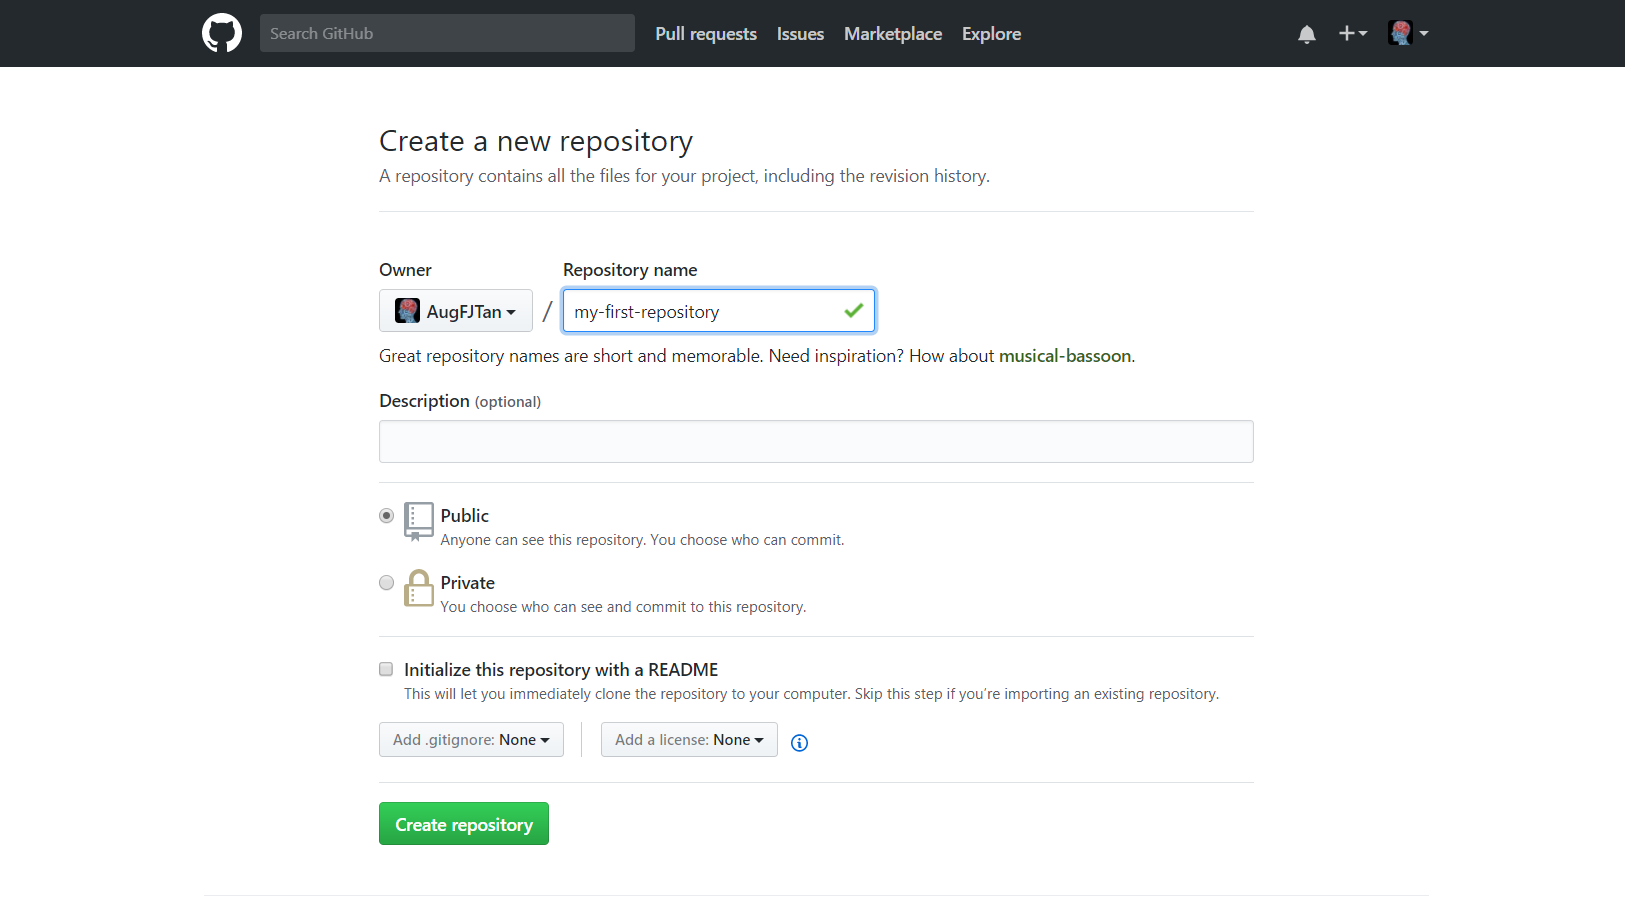
The remote repository should be left empty. To upload the code from your computer to this remote repository, we will need to upload it to its URL. Back on the command line, we will create an alias for the URL (usually named origin):
git remote add origin https://github.com/your-username/my-first-repository.git
As a rule of thumb, the URL used is the URL of the GitHub repository followed by .git. Now let’s attempt to push (upload) our changes to the repository:
git push origin master
You will be prompted to authenticate your push using your GitHub credentials. You will only need to do this authentication once on your computer. If everything goes well, the changes will be pushed to the remote repository.
And that’s it! If you want to update the remote repository, all you have to do is git add, git commit and then git push. I would suggest having a test repository where you can practice and experiment with the various Git commands. This is by no means a definitive guide, and there are other Git tutorials out there, including one that is available in several languages. When in doubt, read the documentation (online or locally on your computer with git --help some-command). The next article in this series will focus on how to manage your code using Git so that you can always fall back on a working copy of your code should you accidentally mess it up. Practice well and hopefully you will use Git for your future programming projects. Happy Coding!